Have you ever admired a beautiful piece of jewelry and wished you could make something just as stunning? With easy DIY jewelry making, you can turn that dream into a reality. Creating your own jewelry not only allows you to express your creativity but also gives you the satisfaction of wearing something unique and personalized. In this article, we will explore the world of easy DIY jewelry making, from essential tools and materials to various techniques and designs.
DIY jewelry making has become increasingly popular in recent years, and for good reason. It offers a way for individuals to showcase their own style and personality through wearable art. Whether you’re a beginner or an experienced crafter, learning how to make your own jewelry is a rewarding and fulfilling hobby.
One of the key benefits of making your own jewelry is the freedom it gives you to customize every aspect of the design. You have the power to choose the materials, colors, patterns, and components that resonate with your personal taste. Additionally, handmade jewelry often carries sentimental value and makes for meaningful gifts for loved ones.
In the following sections of this article, we will delve into the essential tools and materials needed for easy DIY jewelry making. We will discuss selecting the right beads and components for your designs, as well as exploring different beading techniques such as stringing, knotting, crimping, wire-wrapping, and more. Bracelet and necklace designs will be explored along with tips for using recycled materials in your creations.
If you’ve ever wondered how to get started on your own DIY jewelry making journey or are simply looking for new inspiration in this craft, then this article is for you. Join us as we dive into the world of easy DIY jewelry making-from basic techniques to advanced tips-and unleash your creativity one bead at a time.
Essential Tools and Materials for Easy DIY Jewelry Making
When it comes to DIY jewelry making, having the right tools and materials is essential. Whether you are a beginner or an experienced crafter, having the proper supplies can make all the difference in creating beautiful and professional-looking jewelry. Here is a list of basic tools needed for beginners:
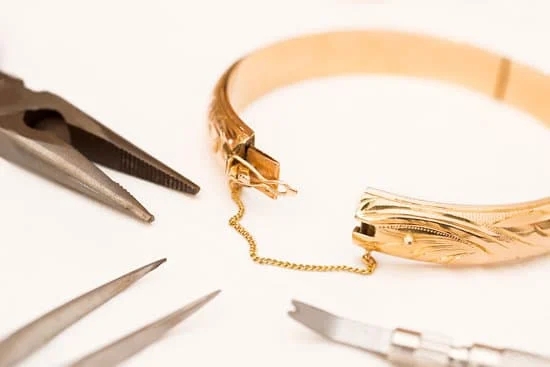
- Pliers: Pliers are a must-have tool for any jewelry maker. They come in different types such as needle-nose pliers, round-nose pliers, and flat-nose pliers. Needle-nose pliers are great for bending wire and holding small components, while round-nose pliers are used to create loops and curves in wire. Flat-nose pliers are perfect for gripping and positioning.
- Wire Cutters: Wire cutters are essential for cutting through wire or beading thread. It’s important to invest in a good quality pair that can cleanly cut through different types of wire without leaving sharp edges.
- Beading Mat: A beading mat provides a soft surface to work on, preventing your beads from rolling away. It also helps keep your workspace organized by providing designated areas where you can lay out your beads and components.
In addition to tools, having the right materials is equally important. Here are some different types of jewelry making materials and where you can find them:
- Beads: Beads come in various shapes, sizes, colors, and materials like glass, gemstones, wooden beads, or acrylic beads. You can find them at local craft stores, online bead shops, or even at flea markets.
- Findings: Findings refer to all the components that connect different parts of your jewelry together such as clasps, jump rings, earring hooks or posts, headpins or eyepins for making dangles or pendants, and crimp beads for securing ends of necklaces or bracelets. You can find findings at craft stores, online jewelry supply shops, or even repurpose old jewelry for unique components.
By having these essential tools and materials, you are well on your way to creating beautiful DIY jewelry. Remember to invest in good quality tools that will last, as they will greatly impact the quality of your finished pieces.
Additionally, be creative in sourcing materials and don’t be afraid to experiment with different types of beads and components to add uniqueness to your designs. Ultimately, DIY jewelry making is all about expressing your personal style and enjoying the process of creating something beautiful with your own hands.
Selecting the Right Beads and Components
When it comes to DIY jewelry making, selecting the right beads and components is crucial in creating beautiful and unique pieces. With so many options available, it can be overwhelming to know where to start. However, with a few tips and some creativity, you can easily navigate through the vast world of beads and components to find the perfect ones for your jewelry designs.
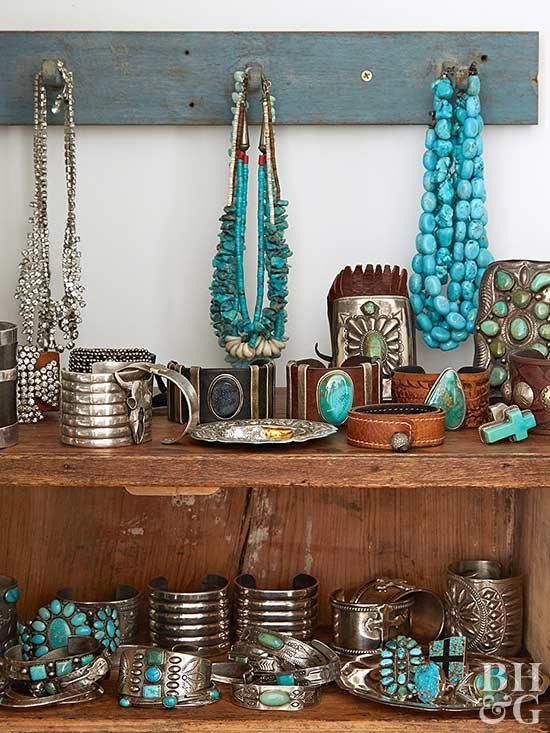
One important tip when choosing beads is to consider the style or theme of your jewelry piece. If you are aiming for a bohemian look, natural stone beads like turquoise or jasper would be a great choice. On the other hand, if you prefer a more elegant and sophisticated style, pearls or crystals may be more suitable.
Additionally, consider the size of the beads and how they will complement your overall design. For example, larger statement beads can be paired with smaller accent beads to create visual interest.
In addition to beads, components such as clasps, chains, and pendants play an essential role in giving your jewelry a polished finished look. When selecting clasps, make sure they are secure and easy to use. Lobster claw clasps are popular for bracelets and necklaces due to their reliability.
Chains come in various styles such as cable chain or snake chain that can add different textures to your designs. Pendants are great focal points in necklaces or earrings and can range from simple geometric shapes to intricate designs.
With online stores and local craft shops offering a wide variety of beads and components, it’s easy to get lost browsing through endless options. However, having an idea of the style you want for your jewelry piece along with some knowledge about bead materials and finishes can help narrow down your choices.
Remember that experimentation is key when it comes to DIY jewelry making – don’t be afraid to mix different bead types or components to create a truly unique and personalized piece.
Simple Beading Techniques
When it comes to DIY jewelry making, simple beading techniques are essential to learn. Whether you are a beginner or have some experience in jewelry making, understanding these techniques will allow you to create beautiful and unique pieces. In this section, we will provide a step-by-step guide to basic beading techniques and show you how to add charms and findings to your jewelry.
Step-by-Step Guide
The first beading technique that every jewelry maker should know is stringing. Stringing involves using a flexible material such as wire or string to thread beads onto and create a design. To start, choose the beads you want to use and select a suitable stringing material. Measure the desired length for your piece and cut the string accordingly.
Use bead stoppers at both ends of the string to prevent the beads from slipping off as you work. Begin threading your chosen beads onto the string, following your desired pattern or design. Once all the beads are in place, remove the bead stoppers and tie a secure knot at each end of the string. Finally, attach a clasp or closure of your choice for easy wearing.
Another important beading technique is knotting, which adds security and durability to your designs. Knotting can be especially useful if you’re working with smaller beads that may have gaps between them when strung without knots. To begin knotting, simply slide a bead onto your thread followed by tying an overhand knot right after it.
Pull the knot tightly towards the bead but not too much that it doesn’t leave space for movement on the thread. Continue this process until all of your chosen beads have been knotted into place along with securing clasps or pendants.
Adding Charms and Findings
Charms and findings are great additions that can enhance your jewelry designs by adding extra flair or functionality. Charms are decorative elements that come in various shapes, sizes, and designs. They can be attached to a necklace, bracelet, or earring using jump rings or wire-wrapping techniques. Findings refer to the necessary components for finishing your jewelry, such as clasps, chains, and earring hooks. These findings are essential for adding wearable closures and connecting different pieces of jewelry together.
To add charms and findings to your jewelry, you will typically need pliers like round-nose pliers and chain-nose pliers. Round-nose pliers allow you to create loops or manipulate wire into various shapes, while chain-nose pliers help with gripping and bending wire accurately. To attach a charm or finding using jump rings, open the jump ring by twisting it sideways with your pliers.
Slide the charm or finding onto the opened jump ring and then thread it onto the desired part of your jewelry design. Close the jump ring by aligning both ends of the ring and squeezing it tightly shut.
By mastering these simple beading techniques and incorporating charms and findings into your designs, you can elevate your DIY jewelry making skills to new heights. With practice and experimentation, you will gain confidence in creating unique pieces that reflect your personal style. So gather your materials and let’s get started on bringing more beauty into the world through easy DIY jewelry making.
Creating Wire-Wrapped Jewelry
Introduction to Wire-Wrapping Techniques and Tools
Wire-wrapping is a popular technique in DIY jewelry making that adds a unique and artistic touch to your designs. It involves using wire to create intricate patterns, secure beads or stones, and form various shapes. Wire-wrapped jewelry is not only beautiful, but it also allows for endless creativity and customization. In this section, we will explore the basics of wire-wrapping techniques and the essential tools you’ll need to get started.
When it comes to wire-wrapping, there are a few key tools that every beginner should have in their arsenal. One of the most important tools is a set of jewelry pliers, including round-nose pliers, chain-nose pliers, and wire cutters.
Round-nose pliers are used for creating loops and curves in the wire, while chain-nose pliers are perfect for gripping and holding wires securely. Wire cutters come in handy for trimming excess wire or cutting through thick gauge wires.
In addition to pliers and cutters, you’ll also need different gauges of wire suited for your project. The gauge refers to the thickness of the wire; the higher the gauge number, the thinner the wire. For beginners, it’s recommended to start with 20 or 22-gauge wire as they are more flexible and easier to manipulate. As you gain more experience, you can experiment with thicker gauges for sturdier designs.
DIY Wire-Wrapped Earrings or Pendants Tutorial
Now that you have your tools ready, let’s dive into a step-by-step tutorial on creating wire-wrapped earrings or pendants. For this project, we will be using 20-gauge artistic wire and a pair of round-nose pliers.
- Start by cutting a piece of wire measuring around 8 inches long.
- Using the round-nose pliers, grip the wire about 1 inch from one end and create a loop by rotating your wrist away from your body.
- Place the loop onto the earring hook or pendant bail, if applicable, and hold it in place using the chain-nose pliers.
- Begin wrapping the longer end of the wire around itself, working downwards towards the loop. Make sure to keep each wrap tight and close together.
- Continue wrapping until you reach just above the loop. Trim any excess wire with wire cutters and use chain-nose pliers to tuck in any sharp ends.
Remember, practice makes perfect when it comes to wire-wrapping. Experiment with different wire gauges, bead combinations, and techniques to create your own unique designs. With time and patience, you’ll be able to master this fascinating jewelry-making technique.
Easy Bracelet and Necklace Designs
Creating your own bracelets and necklaces can be a fun and rewarding experience. Whether you are a beginner or have some experience with DIY jewelry making, this section will provide step-by-step instructions for making a beaded bracelet and offer tips for designing and stringing a necklace with different beads and components.
To make a simple beaded bracelet, you will need the following materials:
– Beads of your choice.
– Jewelry wire or elastic cord.
– Crimp beads (if using jewelry wire).
– Jump rings (if using a clasp).
– Clasp (lobster clasp or toggle clasp).
Step 1: Measure the length of your wrist to determine how long the bracelet should be. Cut your jewelry wire or elastic cord to the desired length, leaving some extra length for attaching the clasp.
Step 2: String your beads onto the wire or cord in your desired pattern. You can use one type of bead or mix different colors and shapes for a more intricate design.
Step 3: If you are using jewelry wire, attach one end of the wire to one side of the clasp using a crimp bead. Thread the wire through the crimp bead, then through the loop of the clasp, and back through the crimp bead. Use crimping pliers to flatten the crimp bead and secure it in place. Trim any excess wire.
Step 4: Repeat Step 3 on the other end of the bracelet, but attach a jump ring instead of directly to the clasp. This will allow you to easily open and close the bracelet.
If you prefer making necklaces, here are some tips for designing and stringing them:
- Choose beads that complement each other in color, shape, size, and texture. You can create interesting combinations by mixing gemstone beads, glass beads, metal charms, or even natural materials like wooden beads or shells.
- Consider the length and style of the necklace. For a choker-style necklace, choose shorter strands of beads. For a longer necklace, you can opt for one long strand or multiple strands layered together.
- Experiment with different components such as chains, pendants, and spacers to add visual interest to your necklace.
- To string the beads, use a beading wire or thread that is strong enough to hold the weight of the beads. Similar to the bracelet making process, you can use crimp beads and jump rings to attach a clasp to one end of the necklace.
By following these simple steps and exercising your creativity, you can design and create beautiful bracelets and necklaces that reflect your personal style. Whether it’s a casual everyday accessory or an elegant piece for special occasions, handmade jewelry adds a unique touch to any outfit or gift.
| Bracelet Design | Beads Used |
|---|---|
| Simple Beaded Bracelet | Round glass beads in various colors |
| Gemstone Charm Bracelet | Gemstone beads with metal charms |
| Wire-Wrapped Bangle Bracelet | Copper wire with crystal beads |
Using Recycled Materials for DIY Jewelry Making
Repurposing old jewelry and materials for new designs can be a fun and eco-friendly way to create unique pieces of jewelry. Not only does it give new life to old, forgotten pieces, but it also allows you to add a personal touch to your creations. There are endless possibilities when it comes to using recycled materials in your DIY jewelry making projects.
One common way to repurpose old jewelry is by taking apart necklaces, bracelets, or earrings that are no longer in use. By removing the beads or components from these pieces, you can use them as individual elements in your own designs. This not only saves money on buying new materials but also provides a wide variety of beads and findings that may be hard to find elsewhere.
In addition to repurposing old jewelry, you can get creative by using common household items in your jewelry making. For example, buttons can make adorable pendants or charms when attached to a chain or cord. Bottle caps can be transformed into unique earrings or used as colorful accents on bracelets. With some imagination and basic crafting skills, you can create stunning pieces of jewelry from items that would otherwise be thrown away.
| Recycled Material | Idea |
|---|---|
| Old necklace with glass beads | Use the glass beads to create a beautiful wrap bracelet. |
| Buttons | Create a statement necklace by stringing different buttons together with wire. |
| Bottle caps | Paint and decorate bottle caps before attaching them as charms to a charm bracelet. |
Not only does using recycled materials in your DIY jewelry making promote sustainability, but it also adds a unique and personal touch to your creations. It allows you to experiment with different materials and transform everyday objects into beautiful accessories. So before throwing away old jewelry or common household items, consider how they can be repurposed and incorporated into your next DIY jewelry project.
Tips for Starting a DIY Jewelry Making Business
Starting a DIY jewelry making business can be an exciting and fulfilling endeavor. Not only will you be able to express your creativity, but you can also turn your passion into a small business. However, like any other business venture, it requires careful planning and consideration. Here are some tips to help you get started on the right foot.
Firstly, it is important to define your niche and target market. Take some time to research what kind of jewelry is in demand and identify a unique selling point for your products. For example, you could specialize in bohemian-inspired jewelry or eco-friendly designs. By focusing on a specific niche, you can differentiate yourself from competitors and attract a loyal customer base.
Next, create a strong brand identity for your business. This includes designing a logo, choosing a color scheme, and creating a cohesive visual style that reflects the aesthetic of your jewelry. Building an appealing and professional brand image will help build trust with customers and set you apart from hobbyists.
In addition to establishing a strong online presence through social media platforms and an e-commerce website, consider participating in local craft fairs or markets to showcase your creations. This not only allows potential customers to see your jewelry up close but also provides valuable networking opportunities with other artisans and potential stockists.
When pricing your handmade jewelry, consider factors such as the cost of materials, labor involved in crafting each piece, and any overhead expenses such as packaging or marketing costs. It’s essential to strike a balance between affordability for customers while ensuring profitability for yourself.
Lastly, don’t forget about the legal aspects of running a small business. Registering your business name, obtaining necessary permits or licenses (if applicable), and familiarizing yourself with any local regulations are all crucial steps towards running a legitimate operation.
Starting a DIY jewelry making business may seem daunting at first, but with careful planning and dedication, it can be a rewarding venture. Remember to stay true to your creative vision, continually refine your skills, and stay informed about industry trends. With passion and persistence, you can turn your love for jewelry making into a thriving business.
Finishing Touches and Care for Handmade Jewelry
Once you’ve completed your beautiful handmade jewelry pieces, it’s important to give them the finishing touches they deserve. Adding the right clasps and finishing techniques not only enhances the overall look of your jewelry but also ensures its durability. Additionally, taking care of your handmade jewelry will help prolong its lifespan and keep it looking fabulous for years to come.
When it comes to adding clasps to your jewelry, there are various options to choose from depending on the style and functionality you desire. Lobster clasps and spring ring clasps are commonly used for necklaces and bracelets as they provide a secure closure.
On the other hand, toggle clasps can add an elegant touch to your designs while still being easy to use. It’s essential to select high-quality clasps that match well with the overall aesthetic of your piece.
In terms of finishing techniques, there are several options available depending on the type of jewelry you’re creating. For stringing projects, using crimp beads or tubes is a popular method for securing the ends of beading wire or threads while attaching a clasp.
Knotting techniques such as square knots or surgeon’s knots can also add a decorative element while keeping your beads in place. If you’re working with chain-based jewelry, you can use jump rings to connect different components like charms or pendants.
Caring for your handmade jewelry is equally important in maintaining its beauty and longevity. It’s recommended to remove your jewelry before engaging in activities that may cause damage such as swimming or exercising. When storing your pieces, keep them in separate compartments or lined with soft fabric to prevent scratching or tangling. Regular cleaning with mild soap and water can help remove dirt and oils that accumulate over time, but be sure to dry them thoroughly afterward.
By giving attention to these finishing touches and practicing proper care, you can ensure that your handmade jewelry retains its allure and remains in pristine condition for years to come. Taking the time to add these final details and learning how to keep your jewelry looking its best will help you feel proud of your creations and allow you to enjoy wearing them or gifting them to others.
Conclusion
In conclusion, easy DIY jewelry making offers numerous benefits and the opportunity for personal creativity. By making your own jewelry, you have the freedom to design pieces that reflect your style and personality. Not only does this allow for self-expression, but it also gives you a sense of accomplishment and satisfaction in creating something unique.
One of the major advantages of DIY jewelry making is the cost-saving aspect. Instead of purchasing expensive jewelry from stores, you can create beautiful pieces using affordable materials and tools. It also allows for customization, as you can choose specific beads, components, and colors to match your preferences or the needs of a specific outfit or occasion.
Furthermore, engaging in DIY jewelry making can be a great way to relax and unwind. It provides a form of therapy and stress relief by allowing you to focus on a creative project that brings joy and fulfillment. Whether you are a beginner or an experienced crafter, there is always something new to learn in the world of jewelry making – from mastering different techniques to experimenting with various materials.
So why not explore your creativity and start your own jewelry-making journey? From selecting beads and components to learning simple beading techniques or wire-wrapping skills, there is so much to discover.
Whether you choose to make jewelry for yourself or turn it into a small business venture, remember that the true beauty lies in the process itself – the joy of bringing imagination to life through your own hands. So go ahead, gather your tools and materials, embrace your artistic side, and enjoy the endless possibilities of easy DIY jewelry making.

Welcome to my jewelry blog! My name is Sarah and I am the owner of this blog.
I love making jewelry and sharing my creations with others.
So whether you’re someone who loves wearing jewelry yourself or simply enjoys learning about it, be sure to check out my blog for insightful posts on everything related to this exciting topic!


