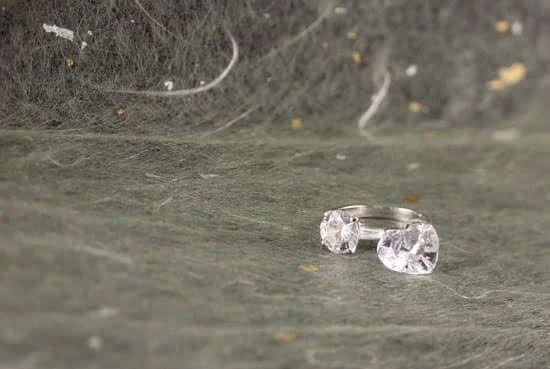
Are you looking to add a touch of elegance and uniqueness to your jewelry box? In this comprehensive guide, we will show you how to attach beads to a jewelry box, transforming it into a stunning piece of art. Whether you are a beginner or an experienced crafter, this step-by-step tutorial will provide you with all the necessary information to create a beautiful beaded jewelry box that will showcase your personal style and creativity.
Jewelry box beading is not only a practical way to organize and protect your precious jewelry, but it also adds a decorative element that can enhance the overall aesthetic of your room. The intricate patterns and designs created with beads can turn a plain and ordinary jewelry box into a beautiful and eye-catching accessory for your dresser or vanity. With the right tools, materials, and techniques, you can easily transform any plain jewelry box into a work of art.
In this article, we will cover everything you need to know about jewelry box beading, from the tools and materials required for the project to creative design ideas for making your beaded jewelry box truly unique. We will guide you through the preparation process, selecting the right beads, attaching them properly, adding finishing touches, and maintaining your beaded jewelry box for long-lasting beauty.
So let’s dive in and learn how to create a stunning beaded jewelry box that reflects your personal style and craftsmanship.
Tools and Materials
When it comes to attaching beads to a jewelry box, having the right tools and materials is essential to ensure a successful and beautiful end result. Before you begin, make sure you have the following items on hand:
1. Jewelry Box: Choose a wooden or metal jewelry box with a flat surface for easier beading.
2. Beads: Select an assortment of beads in different sizes, shapes, and colors to create an eye-catching design. You can choose from glass beads, seed beads, gemstone beads, or crystal beads, depending on your preference.
3. Beading Thread: Use a strong and flexible beading thread such as nylon or silk that will hold the beads securely in place on the jewelry box.
4. Beading Needle: A thin beading needle will help you easily thread the beads onto the beading thread.
5. Adhesive: Opt for a strong adhesive, such as jewelry glue or super glue, to secure any loose beads in place and provide extra reinforcement.
6. Pliers: Round-nose pliers are handy for bending and shaping wire if you plan to incorporate wirework into your beaded design.
7. Design Template: Consider using a design template or sketch your desired bead pattern on paper before transferring it onto the jewelry box to guide you during the beading process.
By ensuring you have all these tools and materials ready before starting your project, you’ll be well-prepared for creating a stunning beaded jewelry box that reflects your personal style and creativity. Now that we’ve covered the tools and materials needed for this project let’s move on to preparing the jewelry box for beading.
Preparation
When it comes to preparing a jewelry box for beading, there are a few important steps to follow to ensure that the beads will adhere properly and create a beautiful finished product. The first step in the preparation process is to thoroughly clean the surface of the jewelry box where the beads will be attached. Use a gentle cleanser and a soft cloth to remove any dirt, dust, or residue that may interfere with the adhesion of the beads.
After cleaning the surface, it’s important to roughen it up slightly to provide better grip for the adhesive. This can be done using fine-grit sandpaper or an emery board. Gently rub the sandpaper or emery board over the surface of the jewelry box in circular motions, being careful not to apply too much pressure and damage the wood or other material.
Once the surface has been cleaned and roughened, it’s time to plan out the bead placement. Use a pencil to lightly mark where you want each bead to go, ensuring that they are evenly spaced and creating a design that is pleasing to the eye. This step is crucial for achieving a professional-looking result when attaching beads to your jewelry box.
| Preparation Step | Description |
|---|---|
| Cleaning | Thoroughly clean the surface with a gentle cleanser and soft cloth |
| Roughening | Use fine-grit sandpaper or emery board to roughen up the surface for better grip |
| Planning Bead Placement | Lightly mark with pencil where you want each bead to go for an evenly-spaced design |
Choosing the Right Beads
Consider the Style of Your Jewelry Box
Before choosing beads for your jewelry box, consider the style and theme of the box itself. Is it elegant and classic, modern and minimalist, or bohemian and eclectic? The style of your jewelry box will influence the type of beads you should select. For example, if you have a vintage-inspired jewelry box, you might want to choose antique-looking beads such as pearls or glass beads with intricate designs.
Play With Colors and Textures
When selecting beads for your jewelry box, don’t be afraid to play with colors and textures to create a unique and eye-catching design. Consider using a mix of different colored beads in complementary or contrasting hues to add visual interest to your project. You can also experiment with different bead shapes and textures such as smooth glass beads, faceted crystals, or matte seed beads to create dimension and depth on your jewelry box.
Quality Matters
It’s important to choose high-quality beads for your jewelry box project to ensure durability and longevity. Look for beads that are well-made with consistent shapes, smooth edges, and vibrant colors. Beads made from materials like glass, crystal, gemstones, or metal are excellent choices for adding a touch of luxury to your jewelry box. Investing in quality beads will not only enhance the overall look of your project but also ensure that it withstands daily use.
By following these tips and tricks for selecting the perfect beads for your jewelry box, you can create a stunning piece that reflects your personal style and creativity. With careful consideration of style, colors, textures, and quality, you can transform a plain jewelry box into a one-of-a-kind work of art that showcases your passion for beading and craftsmanship.
Attaching Beads
Preparation
Before you start attaching beads to your jewelry box, it’s essential to prepare the surface properly. Clean the area where you’ll be placing the beads to ensure that it’s free from any dust or debris. If the surface is rough, consider sanding it down lightly to create a smooth base for the beads.
Adhesive Selection and Application
When attaching beads to a jewelry box, it’s crucial to choose the right adhesive for the job. A clear-drying, strong adhesive that is suitable for both wood and glass surfaces is ideal for this project. Apply a small amount of adhesive onto the back of each bead using a toothpick or small brush, then carefully place them onto the desired area of the jewelry box.
Bead Placement
When attaching beads to your jewelry box, pay attention to spacing and symmetry. Start by placing larger focal beads in strategic locations, then fill in gaps with smaller accent beads. Be mindful of design elements such as color, shape, and texture as you arrange the beads on your jewelry box.
With these detailed steps on how to attach beads to a jewelry box, you can create a stunning and personalized piece that showcases your creativity and craftsmanship. Experiment with different colors and patterns to make your beaded jewelry box truly one-of-a-kind.
Creative Design Ideas
When it comes to creating beautiful bead patterns and designs on your jewelry box, the possibilities are endless. You can use a variety of beads, such as glass, crystal, wood, or even semi-precious stones to add a touch of elegance and personalization to your jewelry storage. Whether you want to create a simple and understated design or an intricate and eye-catching pattern, there are many creative design ideas to consider.
One popular design idea for beaded jewelry boxes is to create a geometric pattern using different colored beads. This can be achieved by arranging the beads in a specific order or sequence to form shapes such as squares, triangles, or diamonds.
Another creative approach is to incorporate floral or nature-inspired designs using beads of varying sizes and colors. By carefully arranging the beads, you can create beautiful flower motifs or leaf patterns that bring a touch of natural beauty to your jewelry box.
If you’re feeling adventurous, you can also experiment with mixed media by combining different types of beads with other materials such as metal charms, ribbons, or fabric. This allows you to add texture and dimension to your design while incorporating unique elements that reflect your personal style.
No matter what design idea you choose for your beaded jewelry box, the key is to let your creativity flow and have fun with the process. Don’t be afraid to experiment with different bead arrangements and color combinations until you find a design that truly speaks to you.
| Creative Design Ideas | Benefits |
|---|---|
| Geometric patterns | Creates an elegant and modern look |
| Floral or nature-inspired designs | Adds a touch of natural beauty |
| Mixed media experimentation | Allows for personalized and unique designs |
Finishing Touches
After taking the time to attach beads to your jewelry box, it’s important to add the final touches to ensure a polished and professional look. These finishing touches will not only enhance the beauty of your beaded jewelry box but also help protect the beads from wear and tear over time. Here are some tips on how to add the final touches to your beaded jewelry box:
- Sealant: Once you have attached all the beads to your jewelry box, it’s essential to apply a sealant to secure the beads in place and protect them from being dislodged. A clear, gloss sealant is recommended as it will give your jewelry box a shiny finish while keeping the beads in place.
- Lining: Consider lining the inside of your jewelry box with a soft fabric such as velvet or satin. This not only adds a luxurious touch but also protects delicate jewelry pieces from scratches and damage caused by the beads.
- Hardware: Pay attention to the hardware on your jewelry box such as hinges, knobs, and clasps. You can enhance the overall look of your beaded jewelry box by replacing old or worn-out hardware with new, decorative pieces that complement the bead design.
Taking these additional steps will not only add a polished look to your beaded jewelry box but also ensure that it remains in pristine condition for years to come.
Remember, these finishing touches are what make your beaded jewelry box truly unique and personalized. Whether you choose to add a pop of color with vibrant lining or opt for elegant hardware, these final details will elevate your DIY project and showcase your creativity and attention to detail. So take pride in adding these finishing touches and enjoy showcasing your one-of-a-kind beaded jewelry box.
Maintenance and Care
In conclusion, learning how to attach beads to a jewelry box can be a rewarding and creative project that adds a personal touch to your storage space. With the right tools and materials, proper preparation, and careful attention to detail, you can create a beautifully embellished jewelry box that reflects your unique style.
Once you have completed your beading project, it’s essential to know how to care for your beaded jewelry box to ensure its longevity. Proper maintenance is key to preserving the beauty of your creation for years to come.
Be sure to dust or wipe down your beaded jewelry box regularly with a soft cloth to keep it free from dirt and debris. Additionally, storing it in a safe place away from direct sunlight and excessive moisture will help protect the beads and prevent them from fading or becoming discolored over time.
By taking the time to care for your beaded jewelry box properly, you can enjoy its beauty and functionality for many years. Whether it’s a gift for yourself or someone else, knowing how to maintain and preserve the intricate beadwork will ensure that it remains a cherished and timeless piece in your collection.
So go ahead and get creative with attaching beads to your jewelry box, knowing that with the right care, it will continue to sparkle for years on end.
Frequently Asked Questions
How Do You Attach Beads to a Chain?
Attaching beads to a chain can be done by using jump rings or bead caps. Open the jump ring, slide the bead onto the chain, and close the jump ring securely. Bead caps can be attached by placing them over the bead and closing them around the chain.
How Do You Make a Bead Box?
Making a bead box involves measuring and cutting pieces of wood for the box base and sides. Then, assembly is done using wood glue and finishing nails. The box can be personalized with paint or decorative paper.
How Do You Attach Beads?
Attaching beads to jewelry or accessories typically involves using a needle and thread if working with fabric, or wire if working with metal. Beads can also be attached using glue, depending on the material being used. It’s important to secure beads properly to prevent them from falling off over time.

Welcome to my jewelry blog! My name is Sarah and I am the owner of this blog.
I love making jewelry and sharing my creations with others.
So whether you’re someone who loves wearing jewelry yourself or simply enjoys learning about it, be sure to check out my blog for insightful posts on everything related to this exciting topic!

