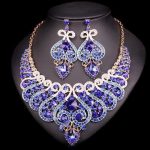
Are you looking to add some creativity and personal touch to your accessories? If so, learning how to make beaded jewelry necklace is a fantastic way to achieve just that.
Handmade beaded jewelry holds a certain allure that mass-produced pieces simply cannot match. In this article, we will explore the art of creating your very own beaded necklaces, from choosing the right beads and tools, to step-by-step tutorials on stringing and adding closures, as well as troubleshooting common issues.
The process of making beaded jewelry allows for endless creativity and self-expression. Whether you are a beginner or an experienced jewelry maker, there is always something new to learn and discover in the world of beadwork. From selecting the perfect beads that reflect your unique style to designing a one-of-a-kind necklace that reflects your personality, the possibilities are limitless.
In this introductory section, we will provide an overview of what you can expect from this article, including sections on choosing the right beads for your project, the tools and materials needed for creating a beaded necklace, design inspiration for different patterns and styles, troubleshooting common issues during the crafting process, and finally adding final touches and embellishments. So grab your beads and let’s get started on creating your own stunning beaded jewelry masterpiece.
Choosing the Right Beads
When it comes to making a beaded jewelry necklace, one of the most important decisions you’ll need to make is choosing the right beads. With so many options available, from different types to sizes and colors, it can be overwhelming to make a selection. However, taking the time to explore your choices will ensure that your finished necklace is exactly as you envisioned it.
First and foremost, consider the type of bead you want to use. There are countless options including glass, semi-precious stones, wood, ceramic, and metal beads among others. Each type of bead offers its own unique look and feel, so take some time to familiarize yourself with the different options before making a decision.
Once you’ve chosen the type of bead, you’ll need to consider the size. Beads come in a wide range of sizes, from tiny seed beads to larger focal beads. Think about the overall style and design of your necklace when selecting bead sizes – larger beads may work well for statement pieces while smaller beads can create intricate patterns.
Finally, color is another important factor when choosing beads for your necklace. Consider the aesthetic you’re trying to achieve – do you want bold and vibrant colors or more muted tones? Will you be using a combination of different colors or sticking to a specific color scheme? By considering these questions and exploring various color options, you’ll be able to make an informed decision that aligns with your vision for your beaded jewelry necklace.
| Types | Sizes | Colors |
|---|---|---|
| Glass | Seed Beads | Bold & Vibrant |
| Semi-precious stones | Focal Beads | Muted Tones |
Tools and Materials Needed for Making a Beaded Necklace
Basic Tools and Materials
To create your own beaded necklace, there are a few essential tools and materials that you will need. First and foremost, you will require a good pair of jewelry-making pliers, such as chain-nose pliers, round-nose pliers, and crimping pliers.
These will help you manipulate the wire or thread that you use to string your beads. Additionally, you will need beading wire or thread, depending on your preference, as well as clasps and closures to finish off your necklace.
Choosing Beads
The type of beads used in making a beaded necklace is crucial to its overall look and feel. There are several options to consider; for example, glass beads offer a classic and elegant appearance, while gemstone beads provide a more natural and earthy aesthetic. Consider the size and shape of the beads as well; larger beads can make a bold statement, while smaller beads allow for more intricate designs.
Other Materials to Consider
In addition to the basic tools and beads, there are other materials to take into account when making a beaded necklace. This may include bead caps, spacers, or charms to add visual interest and variety to your design.
It’s also important to have quality findings such as jump rings and crimps – these small components are fundamental in securing the ends of your beaded creation. By gathering all necessary tools and materials beforehand, you’ll be ready for creating stunning one-of-a-kind necklaces with ease.
Step-by-Step Tutorial on Stringing the Beads Onto the Necklace
Once you’ve gathered all the necessary tools and materials, it’s time to start stringing the beads onto your necklace. Follow this step-by-step tutorial to create a beautiful beaded jewelry piece:
Step 1: Prepare Your Workspace
Before you begin, make sure to create a comfortable and organized workspace. Lay out your beads, stringing material, and any other necessary tools within easy reach. This will help streamline the process and prevent any unnecessary distractions.
Step 2: Measure and Cut the String
Determine the desired length of your beaded necklace and cut a piece of beading cord or wire accordingly. It’s always better to cut more than you think you’ll need – you can always trim off any excess later on. If using a thread or cord that can fray (such as silk), use clear nail polish or bead glue to prevent fraying.
Step 3: Begin Stringing the Beads
Start by threading one end of the cord through a beading needle, if necessary. Then, begin adding your chosen beads onto the cord in the desired pattern or arrangement. You can follow a specific design or create your own unique pattern as you go along.
This step-by-step tutorial provides an overview of how to make beaded jewelry necklace by stringing beads onto your necklace. Following these steps will help guide you through the initial stages of creating a stunning handmade beaded necklace for yourself or as a gift for someone else.
Adding Clasps and Closures
When it comes to making your own beaded jewelry necklace, adding the right clasps and closures is crucial for ensuring that your creation is not only beautiful but also secure. The type of clasp you choose can enhance the overall look of your necklace while providing a functional way to fasten it around your neck.
There are various types of clasps to consider, including lobster clasps, spring ring clasps, and toggle clasps. Each type offers its own unique look and functionality, so it’s important to choose one that complements the style of your necklace and is easy to use.
One essential tip for securing your beaded necklace is to use the right tools for attaching the clasp. You’ll need jewelry pliers, which come in different types such as chain-nose pliers, round-nose pliers, and crimping pliers.
These tools will allow you to manipulate jump rings, attach clasps, and secure closures with ease. Additionally, using the appropriate stringing material such as wire or thread that can withstand the weight of the beads and provide a strong foundation for attaching the clasp is important.
To ensure that your beaded necklace stays securely in place when worn, consider incorporating a safety feature such as adding a few extra beads at the end of each strand before attaching the clasp. This will prevent accidental breakage if the necklace gets pulled unexpectedly. Another tip is to test the closure multiple times before finishing your necklace to ensure that it opens and closes smoothly without any resistance or risk of coming undone.
| Clasp Types | Features |
|---|---|
| Lobster Clasps | Secure and easy to use, ideal for heavier necklaces |
| Spring Ring Clasps | Traditional look with secure closure |
| Toggle Clasps | Decorative and versatile with a unique design |
By following these tips for adding clasps and closures to your beaded necklace, you can create a stunning piece of jewelry that not only looks beautiful but also stays securely in place when worn. Experiment with different clasp styles and techniques to find the perfect finishing touch for your unique creation.
Design Inspiration
Traditional vs. Modern
When it comes to beaded necklaces, there are so many different patterns and styles to choose from. You can opt for a traditional look with symmetrical patterns and classic color combinations, or you can go for a more modern design with asymmetrical patterns and bold, vibrant colors. Consider what style speaks to you the most and start exploring different patterns that reflect that aesthetic.
Nature-Inspired Designs
One popular trend in beaded jewelry is nature-inspired designs. This may include incorporating floral motifs, leaf shapes, or even using natural materials such as wooden beads or semi-precious stones. Taking inspiration from the beauty of nature can result in stunning and unique beaded necklaces that will surely turn heads.
Statement Necklaces
For those who want to make a bold fashion statement, creating a statement beaded necklace is the way to go. This style often involves using larger beads, unique shapes, and eye-catching color combinations. Whether you’re looking to dress up a simple outfit or add an extra touch of glamour to your evening attire, learning how to make beaded jewelry necklace with a statement design can elevate your look.
As you explore different patterns and styles for beaded necklaces, don’t be afraid to let your creativity shine through. Experiment with different combinations of beads, colors, and textures until you find a design that truly reflects your personal style and vision for your handmade masterpiece.
Troubleshooting Common Issues When Making Beaded Jewelry
Making beaded jewelry can be a fun and rewarding hobby, but like any craft, it can come with its own set of challenges. Here are some common issues you may encounter when making beaded jewelry, and how to troubleshoot them:
1. Beads not staying in place: If your beads are sliding around on the string or wire, try using a smaller bead stopper at the end of your necklace to keep them in place. You can also try using a thicker thread or wire to prevent the beads from moving too much.
2. Uneven spacing between beads: Sometimes, you may find that the spacing between your beads is inconsistent, causing your necklace to look unbalanced. To fix this issue, consider using a bead board or laying out your design beforehand to ensure even spacing. You can also use spacer beads between larger beads to help maintain consistency.
3. Difficulty threading the needle: Threading a small needle through tiny beads can be frustrating at times. To make this process easier, try using a needle threader tool or waxing your thread or wire before trying to thread it through the beads.
In addition to these troubleshooting tips, it’s important to have patience and practice when making beaded jewelry. Not every piece will turn out perfectly, but each one is an opportunity to learn and improve your skills.
Final Touches
When it comes to making beaded jewelry necklaces, adding embellishments and personal touches is what truly sets your creation apart. Whether you’re making a necklace for yourself or as a gift for someone else, the final touches can make all the difference in creating a unique and eye-catching piece of jewelry.
One way to add embellishments to your beaded necklace is by incorporating charms or pendants. These can be attached at various points along the necklace to create visual interest and enhance the overall design. Charms and pendants come in a wide range of styles and materials, allowing you to customize your necklace to fit any theme or aesthetic.
Another way to personalize your beaded necklace is by adding spacers or accent beads between the main beads. These smaller beads can serve as subtle accents that complement the main beads, adding texture and dimension to the overall design. Experimenting with different combinations of spacers and accent beads can result in a truly one-of-a-kind piece.
In addition to embellishments, you can also add personal touches to your beaded necklace through customizations such as initials, birthstones, or meaningful symbols. Incorporating these elements into your design can infuse the necklace with sentimental value and make it a truly special keepsake for either yourself or the recipient. Personalizing your beaded necklace in this way not only showcases your creativity but also adds an extra layer of significance to the finished piece.
Conclusion
In conclusion, the process of creating your own beaded jewelry necklace can be incredibly rewarding. Not only does it allow you to express your creativity and personal style, but it also gives you a sense of accomplishment and satisfaction. By following the step-by-step tutorial provided in this article, you have learned how to make beaded jewelry necklace with different types, sizes, and colors of beads, as well as tips for securing your necklace with clasps and closures.
Design inspiration has been explored offering different patterns and styles for beaded necklaces to help spark your imagination and create unique pieces that reflect your individual taste. Troubleshooting common issues when making beaded jewelry has also been addressed, giving you the confidence to overcome any challenges that may arise during the crafting process. Plus, adding embellishments and personal touches to your beaded necklace allows you to infuse it with meaning and significance.
Overall, by mastering the art of making beaded jewelry necklaces, you not only gain a new skill but also have the opportunity to create beautiful pieces that can be treasured or even gifted to others. The satisfaction that comes from wearing or gifting a piece of handmade jewelry that you created with your own hands is truly priceless. So go ahead, unleash your creativity and enjoy the satisfaction that comes from creating your own beaded jewelry masterpieces.
Frequently Asked Questions
How Do You Start Making Bead Necklaces?
To start making bead necklaces, you’ll need to gather your supplies, including beads, a beading wire or thread, clasps, and any additional decorative elements. You’ll then plan the design, measure the appropriate length of string, and start threading the beads onto the wire in your desired pattern.
What Supplies Do You Need to Make Beaded Necklaces?
The supplies you need to make beaded necklaces include beads in various sizes and colors, a beading wire or thread, jewelry clasps or closures, crimp beads or tubes for securing the ends of the wire, needle-nose pliers for manipulating the wire and closing crimp beads, and any additional decorative elements such as charms or pendants.
How Many Beads Do You Need to Make a Necklace?
The number of beads needed to make a necklace depends on several factors such as the length of the necklace, the size of the beads, and the desired spacing between each bead. Generally, for a standard 16-18 inch necklace, you may need around 80-100 beads if using standard-sized spacer beads.
It’s important to plan out your design and layout before beginning to ensure you have enough beads for your project.

Welcome to my jewelry blog! My name is Sarah and I am the owner of this blog.
I love making jewelry and sharing my creations with others.
So whether you’re someone who loves wearing jewelry yourself or simply enjoys learning about it, be sure to check out my blog for insightful posts on everything related to this exciting topic!

