Beaded jewelry pieces are a beautiful and versatile way to add style and personality to any outfit. However, ensuring that the beads are securely attached to the end of jewelry is crucial to prevent them from falling off and potentially getting lost. In this article, we will discuss how to secure beads on the end of jewelry, providing you with essential information and techniques to create stunning and durable pieces.
When it comes to creating beaded jewelry, the proper attachment of beads at the end is essential for both aesthetics and functionality. Whether you are working with bracelets, necklaces, or earrings, knowing how to securely fasten beads will ensure that your creations stand the test of time. From preventing accidental loss to maintaining the integrity of your design, mastering this skill is fundamental for any jewelry maker.
Throughout this article, we will explore different types of jewelry that utilize beads on the end, list the necessary tools and materials needed for this process, detail various techniques for securing beads effectively, provide useful tips and tricks for beginners, address common mistakes to avoid, and offer insights on adding finishing touches. By following these guidelines and honing your skills in securing beads on jewelry, you can elevate your creations and enjoy wearing them with confidence.
Types of Jewelry
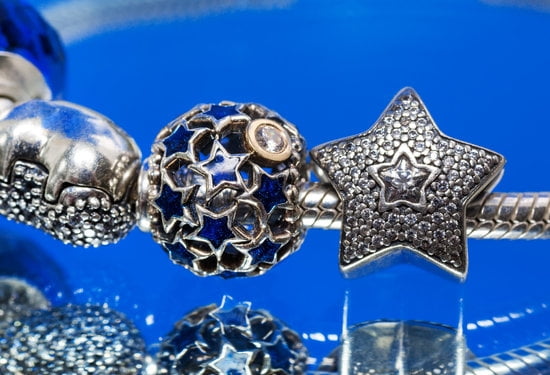
When it comes to jewelry, there are numerous types that incorporate beads on the end to enhance their aesthetic appeal. One popular category is bracelets, which often feature beads as a focal point at the closure or as decorative elements along the length of the band.
Beaded necklaces are another common type of jewelry where beads are used on the end to provide a stylish and colorful finish. Additionally, earrings can also have beads at the end as part of their design, adding a touch of sophistication to any outfit.
To secure beads on the end of these different types of jewelry pieces effectively, it is important to use the right tools and materials. A few essential tools include round-nose pliers for bending wires, crimp beads for securing ends, and wire cutters for trimming excess material. In terms of materials, beading wires or cords are ideal for stringing beads together, while clasps and jump rings are necessary components for completing the attachment securely.
For beginners looking to learn how to secure beads on the end of jewelry pieces, it is essential to start with proper preparation. This includes organizing all tools and materials in a designated workspace, ensuring that everything is easily accessible.
It is also advisable to practice using basic techniques such as crimping beads or tying knots on a sample piece before working on the actual jewelry item. By taking these preparatory steps, individuals can increase their confidence and skill level in securing beads effectively.
| Jewelry Type | Example |
|---|---|
| Bracelets | Beaded charm bracelet |
| Necklaces | Beaded statement necklace |
| Earrings | Dangle earrings with bead accents |
Tools and Materials Needed
When it comes to securing beads on the end of jewelry, having the right tools and materials is essential to ensure a successful outcome. Whether you are a beginner or an experienced jewelry maker, having the necessary items at hand will make the process smoother and more efficient. Here is a list of tools and materials needed to securely attach beads onto your jewelry pieces:
Tools
One essential tool for securing beads on jewelry is a pair of pliers. Round-nose pliers are particularly useful for creating loops or wire-wrapping techniques. Flat-nose pliers can help with gripping and bending wire, while chain-nose pliers are great for precision work. Additionally, you may need wire cutters to trim excess wire or string. A bead reamer can also come in handy for enlarging holes in beads if needed.
Materials
The materials needed for securing beads on jewelry will depend on the type of jewelry you are making. Common materials include various types of beads such as glass beads, gemstone beads, metal beads, and seed beads. You will also need findings like jump rings, crimp beads, clasps, and headpins or eye pins to attach the beads to your jewelry piece. Beading wire, thread or cord will be necessary for stringing the beads together.
Additional Supplies
In addition to basic tools and materials, it is helpful to have a bead mat or tray to keep your beads organized and prevent them from rolling away. A magnifying lamp or glasses may be useful for intricate work with small beads.
If you plan on using glue to secure certain types of beads, make sure to have adhesive specifically designed for jewelry-making. Having these additional supplies on hand will make the process of securing beads on your jewelry easier and more enjoyable.
Preparation
Before you begin the process of securing beads on your jewelry, it is essential to properly prepare to ensure a successful outcome. Here are some key steps to take before starting the bead securing process:
- Inspect Your Tools: Before getting started, make sure that you have all the necessary tools and materials readily available. This may include pliers, wire cutters, crimp beads, clasps, and of course, the beads you will be attaching.
- Select Your Workspace: Choose a clean and well-lit workspace where you can comfortably work without any distractions. Having a designated area for your jewelry-making projects can help you stay organized and focused.
- Measure and Design: Plan out the design of your jewelry piece and measure the length of wire or thread needed to secure the beads in place. This will prevent any issues with running out of material mid-process.
Proper preparation is key when it comes to securing beads on jewelry as it can make the overall process much more efficient and enjoyable. By following these steps, you can set yourself up for success and create beautifully crafted pieces that are securely adorned with beads.
Remember, taking the time to prepare adequately will not only make the process smoother but also ensure that your finished jewelry pieces are durable and long-lasting. Now let’s move on to exploring various techniques for securely attaching beads on different types of jewelry.
Techniques for Securing Beads
When it comes to creating jewelry pieces with beads, one of the most crucial aspects is ensuring that the beads are securely attached. There are several techniques that can be employed to achieve this, depending on the type of jewelry being made. Below are some popular methods on how to secure beads on the end of jewelry effectively:
- Using crimp beads: Crimp beads are small metal tubes that can be flattened to secure the ends of a piece of jewelry, such as a bracelet or necklace. To use crimp beads, slide the bead onto the wire before passing it through a clasp or ring. Once in place, use a pair of crimping pliers to flatten the crimp bead securely.
- Knotting: Knotting is a traditional technique often used in making beaded bracelets and necklaces. After stringing the beads onto the thread or wire, tie a knot at one end before adding a dab of glue for extra security. This method not only secures the beads but also adds an elegant touch to the overall design.
- Wire wrapping: Wire wrapping involves twisting and looping wire around beads or other components to create secure connections. This technique is commonly used in making earrings and pendants. To secure beads using wire wrapping, cut a piece of wire to size, loop it around the bead tightly, and twist it securely around itself.
By mastering these techniques for securing beads on your jewelry pieces, you can ensure that your creations are not only beautiful but also durable and long-lasting. Experiment with different methods to find what works best for your designs and materials used. Remember that practice makes perfect when it comes to mastering the art of securing beads on jewelry.
Tips and Tricks
Securing beads on the end of jewelry can be a fun and creative process, but it is important to do it correctly to ensure that your pieces are durable and long-lasting. For beginners looking to master this skill, there are some helpful tips and tricks that can make the process easier and more successful.
One key tip is to use the right tools for the job. For securing beads on jewelry, you will need tools such as jewelry pliers, wire cutters, bead caps, crimp beads, jump rings, and clasps. Having these tools on hand will make it easier to attach beads securely and create professional-looking pieces.
Another helpful tip is to practice your technique before working on your actual jewelry piece. Take some time to experiment with different bead securing techniques on a spare piece of wire or string. This will give you the chance to perfect your method before applying it to your final jewelry design. Practice makes perfect when it comes to securing beads on jewelry.
| Tip | Details |
|---|---|
| Use the right tools | Jewelry pliers, wire cutters, bead caps, crimp beads, jump rings |
| Practice your technique | Experiment with different techniques on spare wire or string before working on final piece |
Common Mistakes to Avoid
Choosing the Wrong Stringing Material
One common mistake that can occur when securing beads on jewelry is choosing the wrong type of stringing material. It is essential to select a durable and appropriate stringing material based on the weight of the beads and the design of the jewelry piece.
Beading wire, nylon thread, and stretch cord are popular options depending on the project. Using a stringing material that is too weak can result in breakage and lost beads, so it is crucial to consider this factor before starting your project.
Improper Knotting Techniques
Another mistake to avoid when securing beads on jewelry is using improper knotting techniques. Knots play a significant role in ensuring that the beads stay in place and do not come loose over time. It is essential to learn and practice different knotting methods such as overhand knots, surgeon’s knots, or square knots to secure the beads effectively. Failing to use proper knotting techniques can lead to your jewelry pieces falling apart or unraveling unexpectedly.
Neglecting Proper Finishing
Neglecting proper finishing touches is also a common mistake that can compromise the security of beads on jewelry. After attaching all the beads securely, it is crucial to add finishing touches such as closures, crimps, clamshells, or bead tips to ensure that everything stays in place.
These components not only enhance the overall look of your jewelry but also provide additional security for your beads. Skipping this step can result in your beads coming loose or breaking off from the jewelry piece.
By avoiding these common mistakes and following proper techniques for securing beads on jewelry, you can create beautiful pieces that are not only aesthetically pleasing but also durable and long-lasting. Remember to choose suitable stringing materials, master knotting techniques, and add finishing touches to ensure that your beads remain securely attached for years to come.
Finishing Touches
When it comes to ensuring that beads are securely attached to the end of jewelry pieces, adding the finishing touches is crucial. These final steps not only contribute to the overall aesthetics of the jewelry but also play a significant role in making sure that the beads stay in place and the piece is ready to be worn.
One key aspect of adding the finishing touches is to ensure that any knots or closures used in securing the beads are properly secured and concealed. This not only prevents the beads from coming loose but also enhances the overall look of the jewelry. Using techniques such as crimping, knotting, or using glue can help secure beads effectively and provide a professional finish to your piece.
Additionally, inspecting the entire jewelry piece after securing the beads is essential to make sure everything is in place. Checking for any loose ends, weak spots, or gaps can help identify any potential issues before wearing the jewelry.
Taking a few extra minutes to carefully examine your work can save you from having your beads come loose or losing them altogether while wearing your jewelry. Mastering these finishing touches will not only ensure that your beads are securely attached but also make your jewelry pieces look polished and professional.
Conclusion
In conclusion, properly securing beads on jewelry is essential to ensure that the pieces remain intact and beautiful. Whether you are working with necklaces, bracelets, or earrings, using the right techniques and tools can make a significant difference in the durability and appearance of your jewelry. By following the steps outlined in this article, you can create stunning pieces that will last for years to come.
When it comes to securing beads on the end of jewelry, having the right tools and materials is crucial. From crimp beads and pliers to wire cutters and clasps, each item plays a key role in the process. Taking the time to prepare your workspace and gather all necessary supplies before starting will help streamline the process and ensure a successful outcome.
Remember, practice makes perfect when it comes to securing beads on jewelry. Don’t be discouraged if your first attempts are not flawless – keep trying different techniques until you find what works best for you. With patience and dedication, you can master the art of attaching beads securely to your jewelry pieces. So go ahead, give it a try, and unleash your creativity by designing unique jewelry that showcases your personal style.
Frequently Asked Questions
How Do You End Beaded Jewelry?
Ending beaded jewelry requires careful attention to detail to ensure the beads stay in place. One common method is using a crimp bead and a crimping tool to secure the ends of the string. Another option is to tie knots at the end of the string, making sure they are tight and secure.
How Do You Tie Off the End of Beads?
When tying off the end of beads, it’s important to use a secure knot that will prevent the beads from slipping off. A simple overhand knot can work, but for added security, using a surgeon’s knot or square knot can be more reliable. Make sure to pull the knot tightly so it holds firm.
How Do You Attach a Bead to the End of a String?
Attaching a bead to the end of a string can be done by threading the bead onto the string after tying a knot at one end. Once the bead is added, further secure it by tying another knot close to it.
This will prevent the bead from sliding off and keep it in place along the string for your jewelry design.

Welcome to my jewelry blog! My name is Sarah and I am the owner of this blog.
I love making jewelry and sharing my creations with others.
So whether you’re someone who loves wearing jewelry yourself or simply enjoys learning about it, be sure to check out my blog for insightful posts on everything related to this exciting topic!


